I’m going to explain a technique that I implemented for the explosion decals of my game.
Demo available in this github repo.
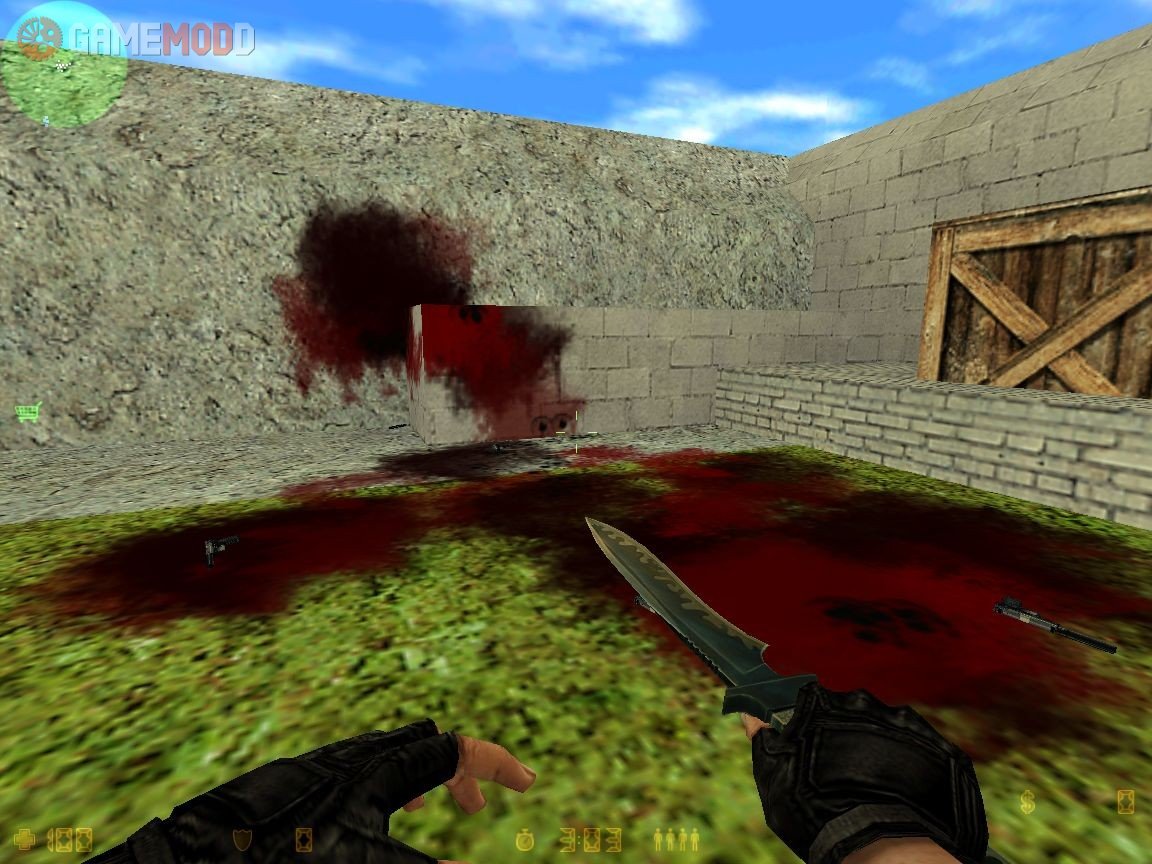
Many games have the need to splat textures on to surfaces dynamically. For example, we might have a floor and we would like to splat some blood onto it when a character has been hurt.
The common approach for implementing these so called decals is to project a quad along a direction. There needs to be a near-far range, so the decal only affects an enclosing box.

There are different variations of directional decals. For example, some of them generate a mesh that wraps the geometry underneath (link), other do it in screen space (link). Some use forward rendering, some use deferred rendering.

My technique uses a different approach to that of directional decals. But I will leave some links here:
- https://gamedev.stackexchange.com/questions/32095/decal-implementation
- http://blog.wolfire.com/2009/06/how-to-project-decals/
- https://bartwronski.com/2015/03/12/fixing-screen-space-deferred-decals/
- https://martindevans.me/game-development/2015/02/27/Drawing-Stuff-On-Other-Stuff-With-Deferred-Screenspace-Decals/
Spherical Decals
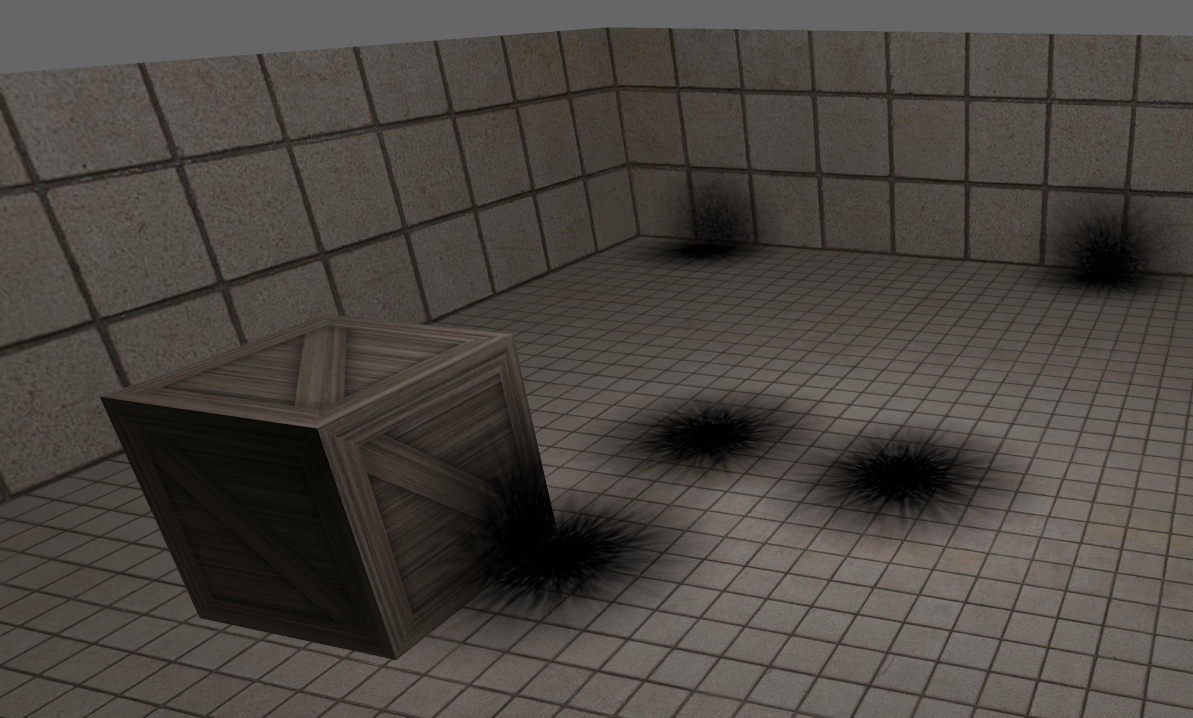
The technique I’m going to explain here has been designed for a very specific use case in my game: explosions. This is a screenshot of what my game currently looks like.
Notice that the game has a top down camera. This is relevant because, as will explain later, this technique has specially good performance in this scenario.
I’m not an artist, and I work alone in this game, so I aimed for a procedural technique. We will make use prodedural noise.
Directional decals project along one direction, spherical decals project in all directions. Think of directional lights vs point lights.

As you can imagine, since we are going to splat the texture in all directions, instead of a 2D texture, we need to use an environment texture (cubemap for example). But we can also generate the texture procedurally.
For each decal we will draw a sphere.
But we actually don’t need to draw the whole sphere; only the intersection of the sphere with the floor and other object static objects in the scene.
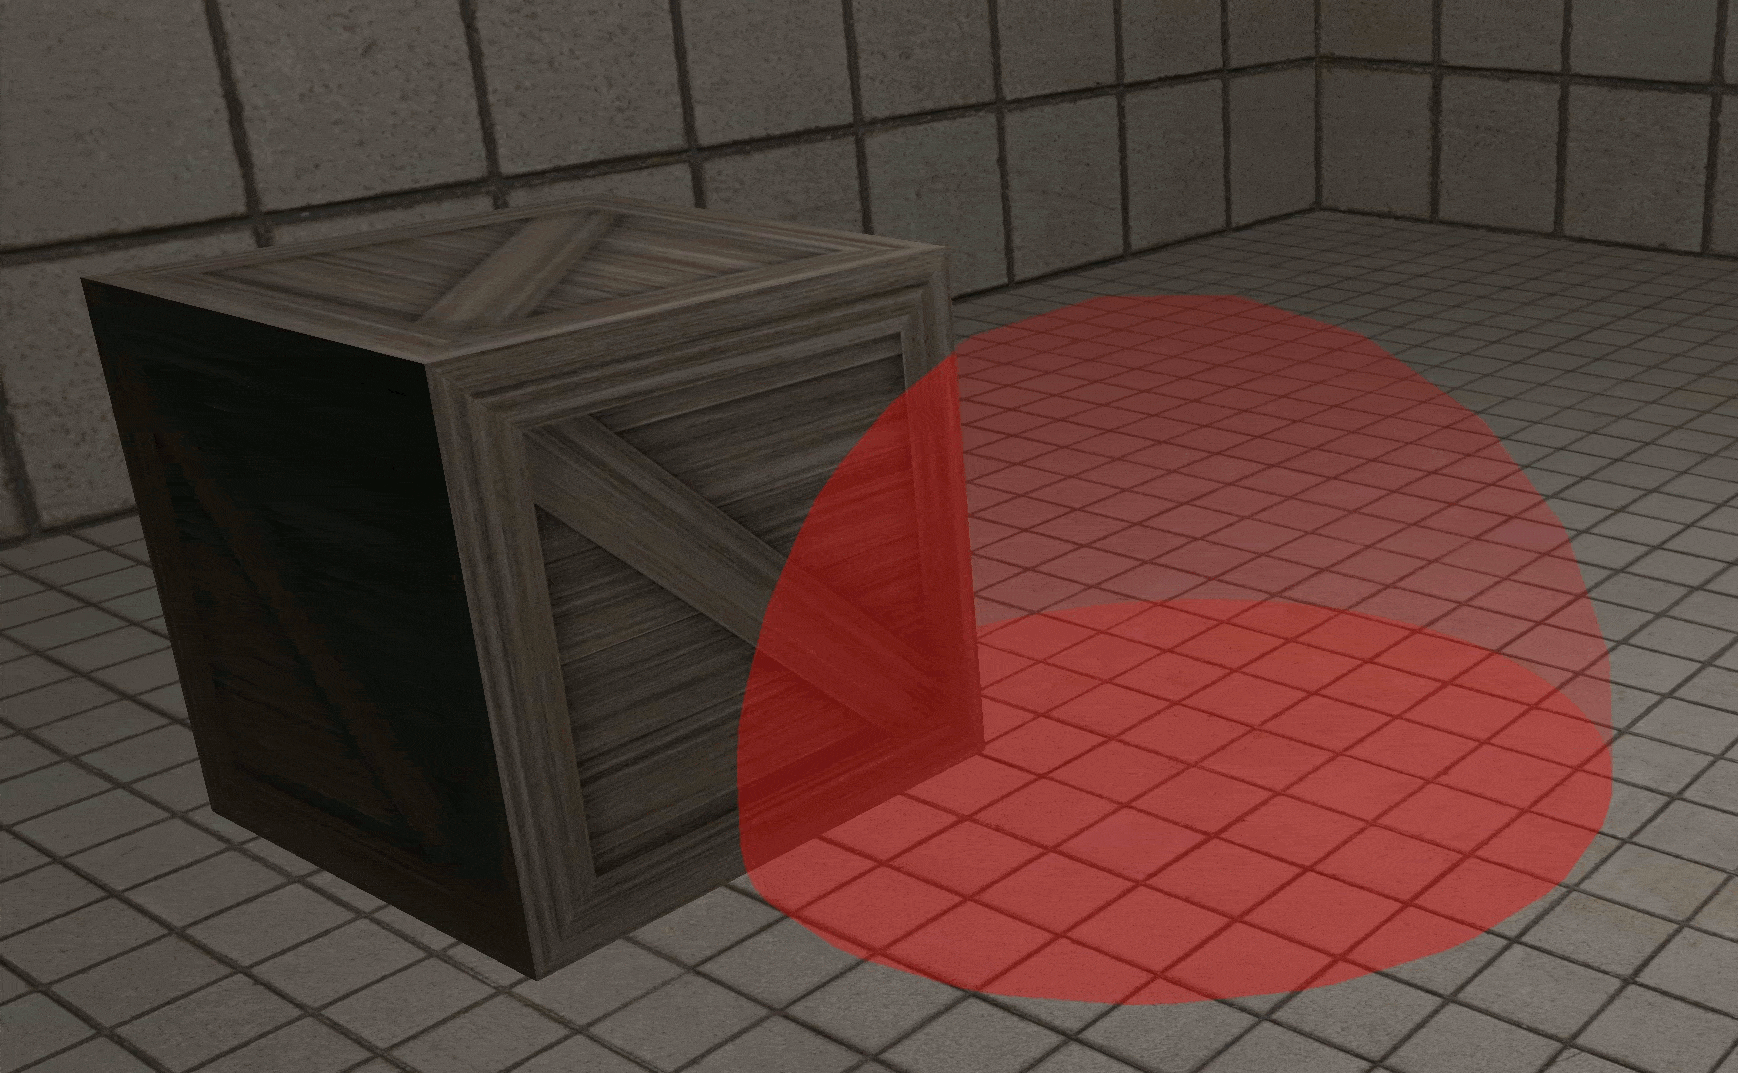
In order to check the surface that intersects the sphere we use the depth buffer. Using the depth, and the XY screen coordinates, we can reconstruct the world position of the background objects. Then we just test if this point is inside the sphere, and discard the fragment otherwise. In the following picture, we would discard the fragment for point B.

As you can see in the previous picture, when the camera has more inclination, there is a bigger surface that needs to be discarded. And when the camera looks downwards, we don’t discard any fragments. That’s why this technique is specially suitable for games with top down camera.
Another important detail to take into account is: what happens when the camera is inside the sphere? If we have depth testing enabled, or backface culling enabled, it won’t draw anything! If in your game it’s possible that the camera enters the radius of the decals, you can do the following:
- Always disable writing to the depth buffer. This applies regardless the camera can be inside the radius of decals or not.
- Invert backface culling: cull external faces, instead of internal faces (glCullFace(GL_FRONT) instead of glCullFace(GL_BACK) if you are using OpenGL). This is so the sphere is visible even when we are inside it.
- Keep depth test enabled but invert the test function (use GL_GREATER instead of GL_LESS if you are using OpenGL).
Procedural noise
Next we are going to generate a procedural enverironement map. We could cache this noisy environment into a cubemap, that’s up to you.
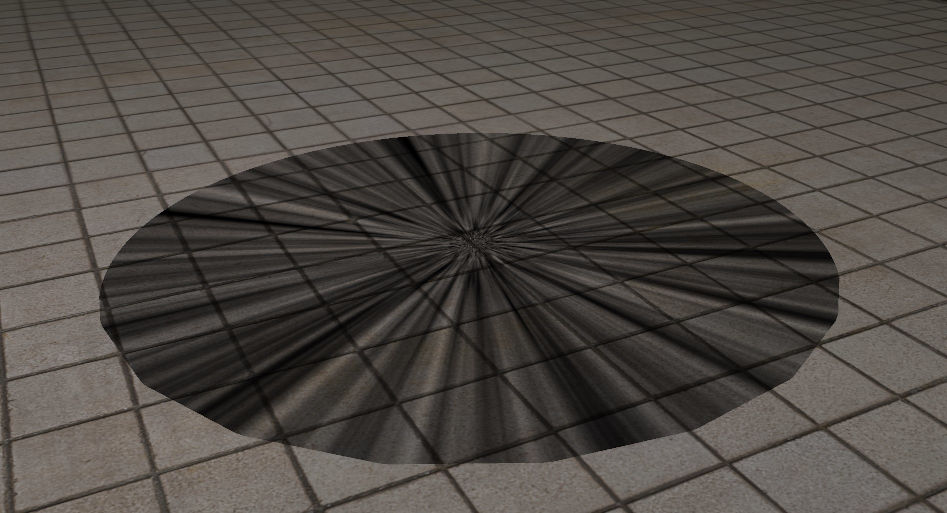
How can we generate noise in the surface of a sphere? A simple method is to generate 3D noise and sample the points at the surface of the sphere.
In order to generate the 3D noise I used the simplex 3D noise implementation of this ShaderToy.
The sampling direction is computed as normalize(backgroundPointPosition - sphereCenter).
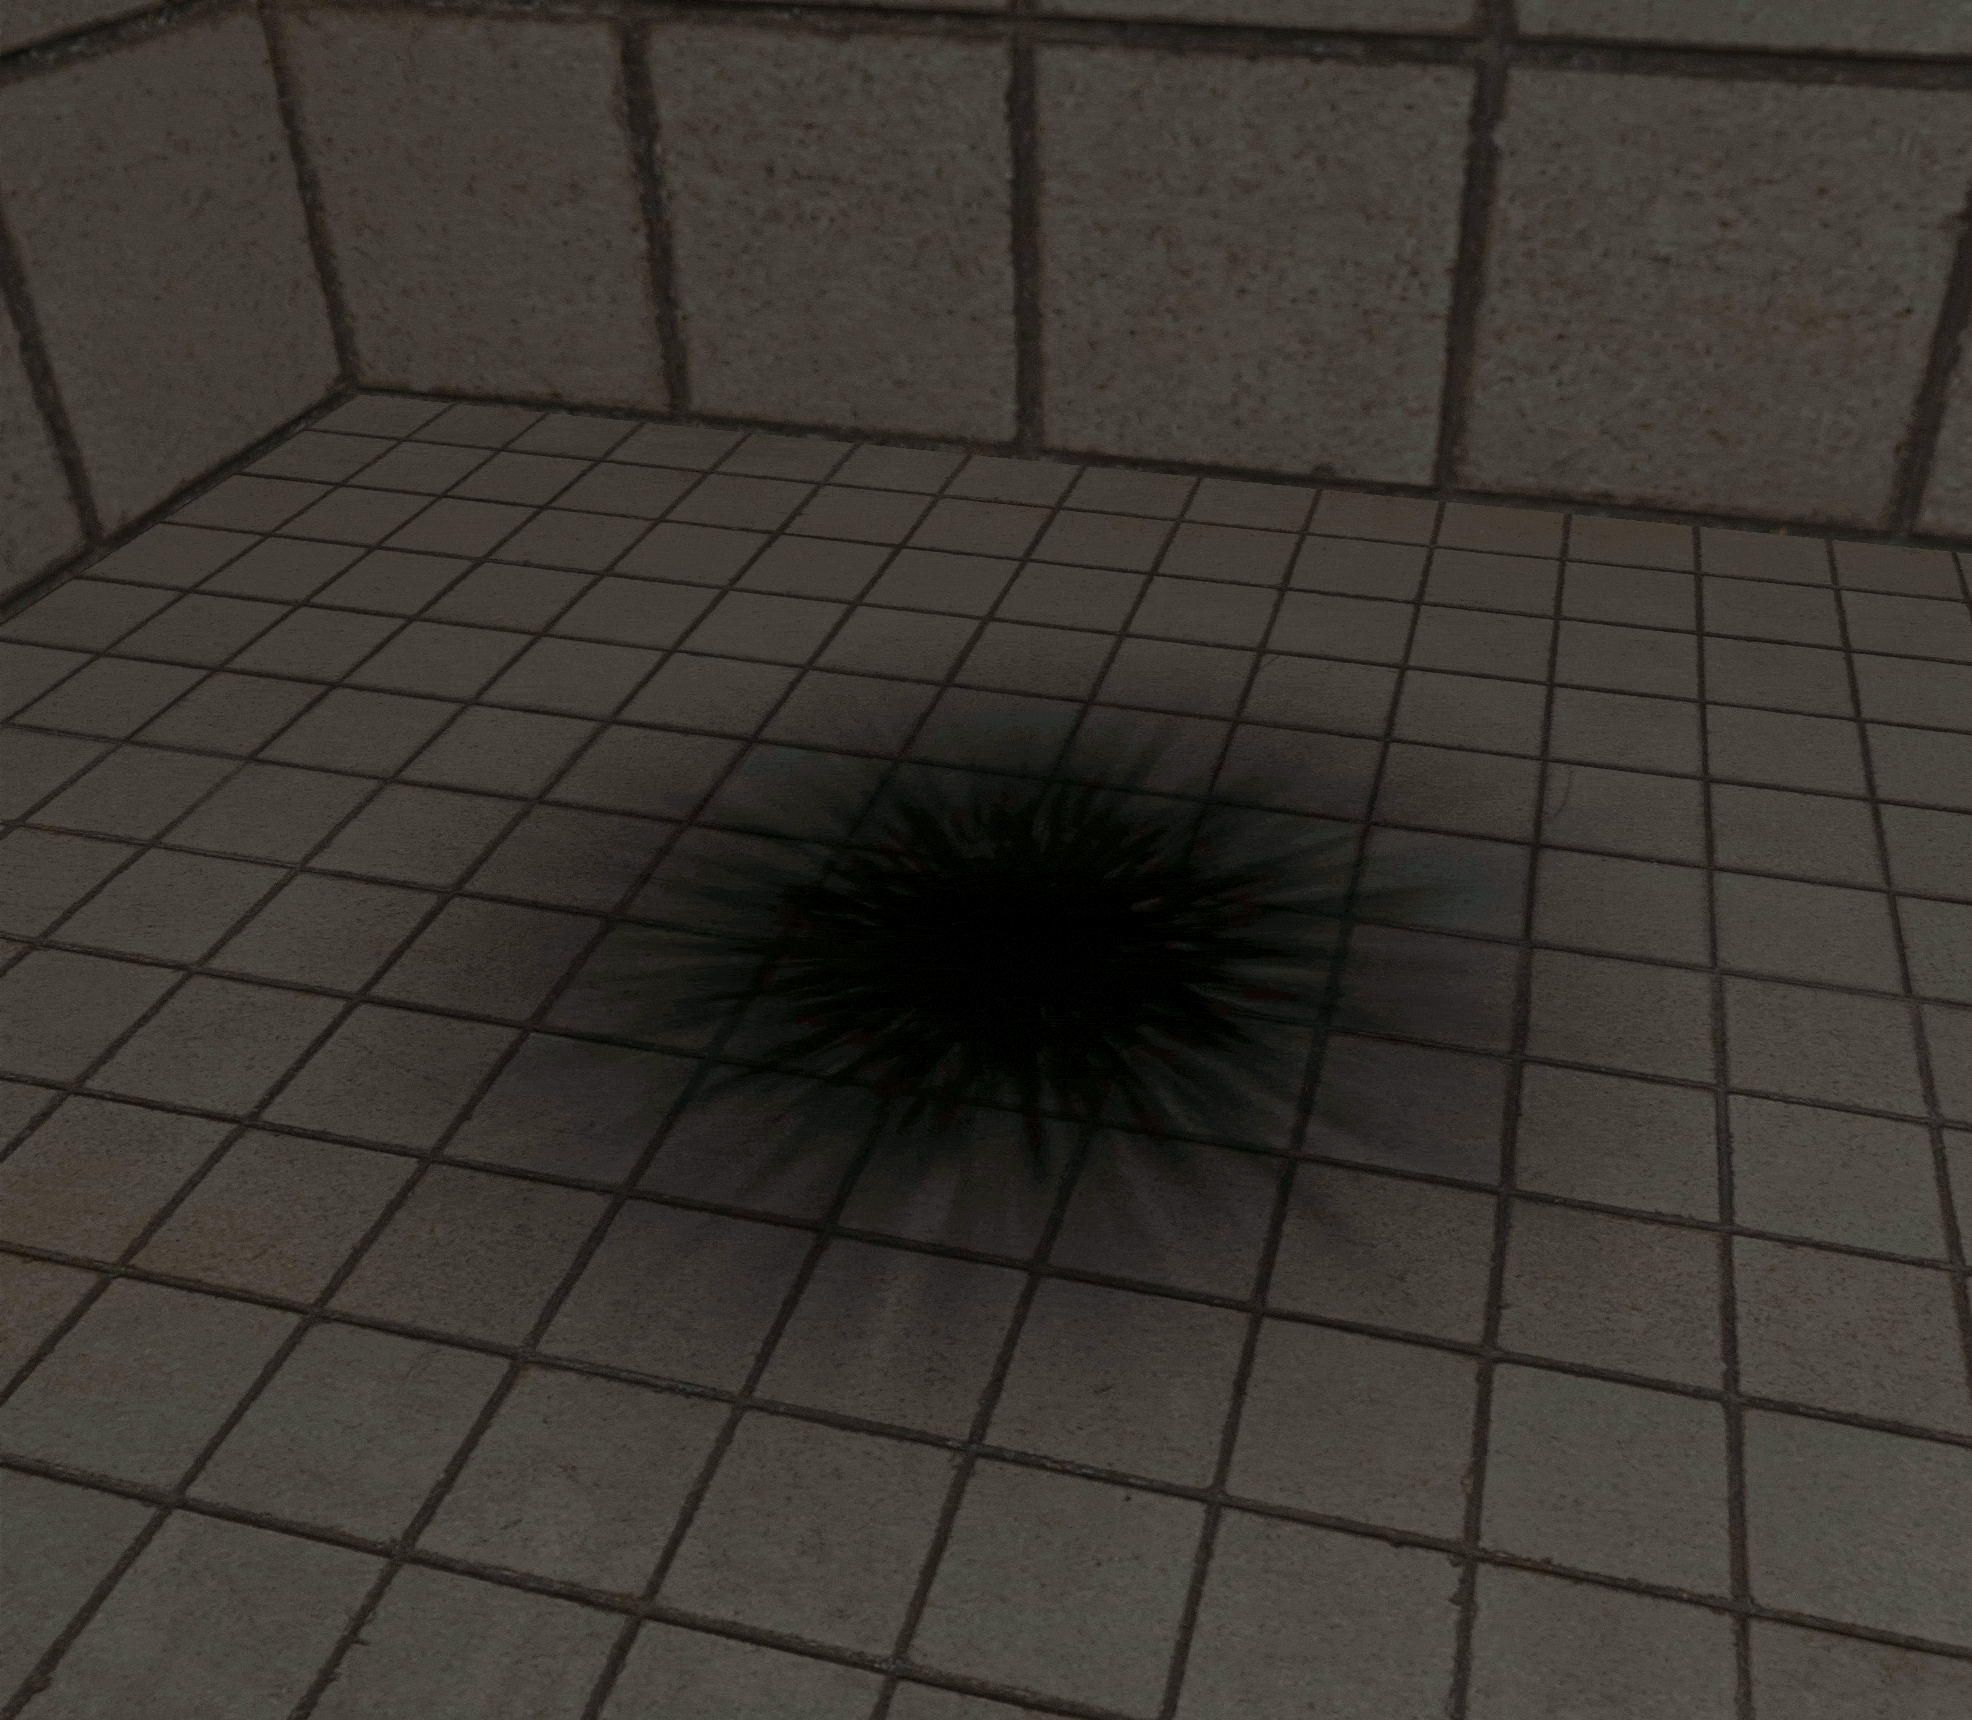
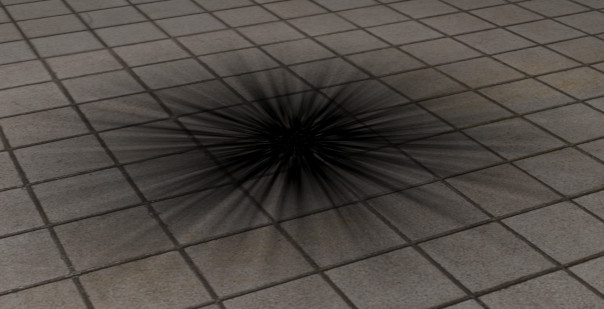
Just sampling the noise, and using it for the alpha channel, you will get something like this.
Looks pretty ugly but we can fix it with some tricks. Introduce an attenuation with the distance, with a pow with a configurable exponent to make the curve more interesting (called u_exponent in the example code). If you need a more complex curve you could use a bezier curve and store the interpolation coefficients in a 1D texture.
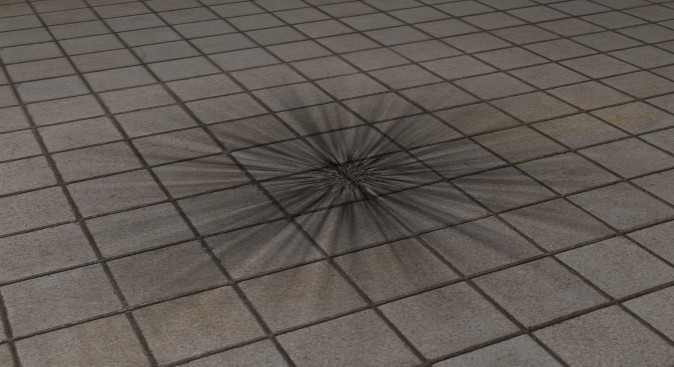
Also I added an additive constant to make it look darker specially at the center of the explosion.
Adding some variety
With this approach, all the decals will look the same because they sample the same noise map. The obvious solution is having multiple noise environment maps. But this is not needed at all. Just assign a random rotation matrix to each decal, and use it to rotate the sampling direction. It’s just one matrix multiplication: sampleDir = rotationMtx * sampleDir;.